In this article, we will see how we can create Desktop Based Application for Multiple Tabs for Different Web URL Using WebView2 in WPF applications in Microsoft Visual C# 2022.
Introduction to WPF (Windows Presentation Foundation)
WPF is a UI framework, designed to create attractive graphical user interfaces for Windows desktop. WPF is a part of Microsoft’s .NET ecosystem and gets installed as a part of .NET and Visual Studio. WPF applications are developed using Visual Studio IDE.
WPF is not a replacement for Windows Forms. WPF was developed to replace Windows Forms but some developers and businesses did not want to give up Windows Forms. Today, both Windows Forms and WPF are supported in Visual Studio to build windows client applications. You can also use Windows Forms controls in WPF and vice versa.
WPF is modern, fast, and more dynamic. WPF provides a rich set of 2D and 3D graphics as well as multimedia controls. It is a set of rich controls, advanced layouts, and beautiful styles and themes. WPF also supports advanced features such as navigation controls, upgraded rendering process, and flexible data binding.
Step 1: Open Visual Studio
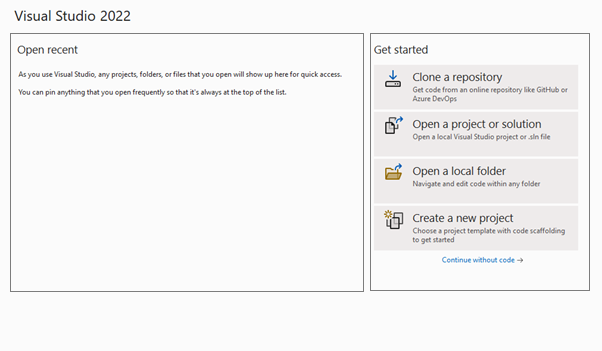
When you open Visual Studio 2022, you will see on the left side a list of your previous projects. On the right side, you will see various options including (as shown in figure 1):
- Clone a Repository
- Open a Project or Solution
- Open a local folder
- Create a new project
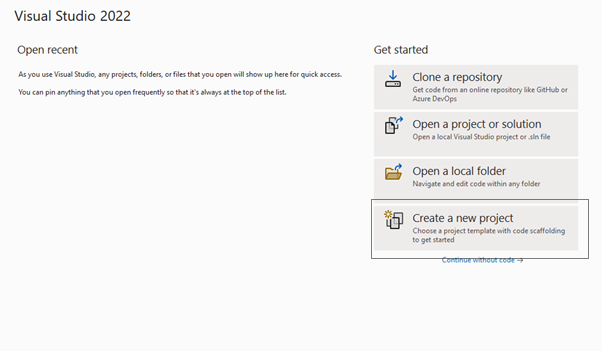
Step 2: Create new Project
Select Create a new project as shown in below screen (as shown in figure 2)
Step 3: Select Project Template
Now, its time to Select the project Template (as shown in figure 3)
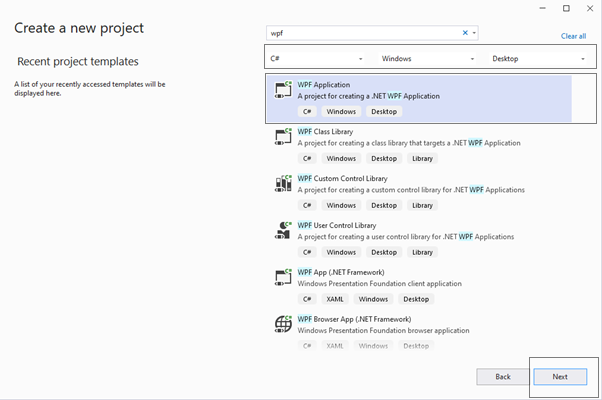
In the available WPF templates, you will notice there are two templates for WPF App – WPF App (.NET Framework) and WPF App (.NET).
.NET Framework and .NET are the different versions of the .NET family; .NET Framework is the older so we are ignoring .NET Framework here. We will use .NET only.
As you can see, we have selected C# as Project language, Windows as a Platform and Desktop as a Project type.
Step 4: Configure your Project
After clicking on a Next Button you will be directed to a configuration screen as shown in Figure 4, It has the following fields.
- Project Name : Type the name of your project. We are naming our project WPF. You can name your project as you desire.
- Location : Lets you browse a folder where you would like to create your new application.
- Solution Name : It is a container for one or more projects in Visual Studio, you can even change the solution name by first unchecking the checkbox which says “Place the solution and project in the same directory” and which will enable the Solution Name text box.
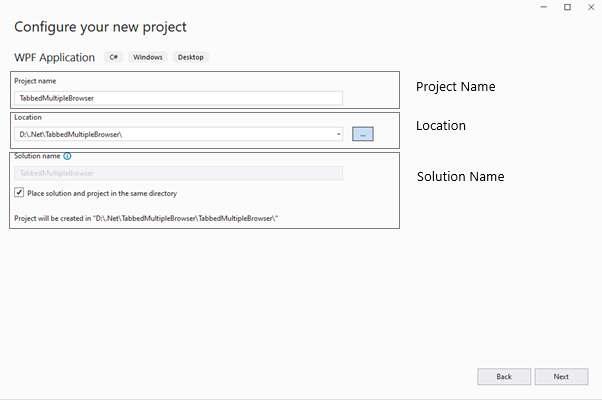
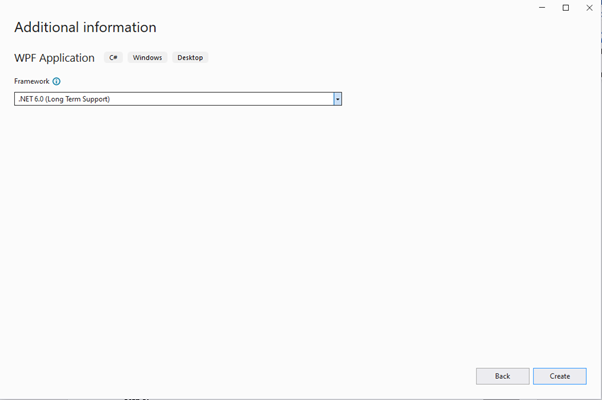
Once you provide all the above information related to your projects, now its time to click Next and see the Additional Information, which is related to framework. In our case, I have selected .NET 6.0 (Long Term Support)
Step 5: Time to create Project
Now click the Create button. This action creates a WPF project with some necessary files already added inside a project. Figure 6 shows the default Visual Studio solution.
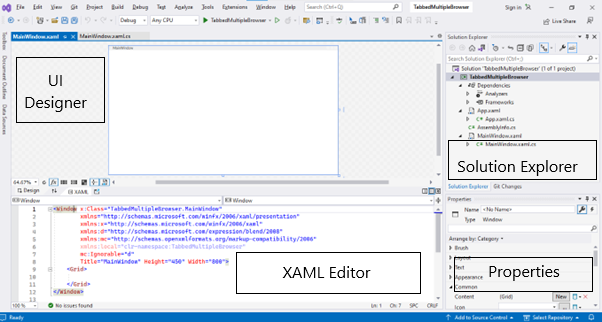
As you can see from Figure 6, there are 4 major sections. Such as
- UI Designer : UI Designer is a window where you can drag and drop elements from a toolbox. We can set layouts such as grid or wrap panel etc. and can arrange other UI elements inside the layout panel. As soon as you drag an element from the toolbox and drop it to the designer, you will notice that the XAML code is automatically written for you by the designer.
- XAML Editor : Code for each UI element is present inside a XAML file, using XAML editor we can position, align, style UI elements, add animations, etc.
- Solution Explorer : Solution Explorer is like a tree view that lists all the projects which are created under the same solution and all the files of those projects. By default, you will see there are 3 nodes created by default for your project – Dependencies, App.xaml, and MainWindow.xaml.
- Dependencies is where we can add references to this project.
- The App.xaml file is an application file that stores resources that are applicable across the entire application.
- The MainWindow.xaml represents the current Window that you see in the designer. As you can see in Figure 6, the XAML editor has a Window and a Grid. These are UI elements; they have been added to the XAML file by default.
- Properties Window :
- This window has different properties & events related to UI elements. We will learn about the Properties window in more detail in the coming sub-chapters. In WPF, each UI element can be represented in two ways.
- At design-time: By a XAML element, This can be achieved in further 2 ways.
- Drag and drop controls from the Toolbar
- Manually typing a code for each UI control in XAML editor
- At run-time by a code-behind class
- At design-time: By a XAML element, This can be achieved in further 2 ways.
For example, the XAML editor represents a window at design time. If you manually add elements into XAML, they will immediately appear on the window, the developer doesn’t have to run the project to see the changes while the code-behind C# class represents a window at run-time, any control added from code-behind won’t be available on windows at design time, one has to run the project to see the changes.